Review | Developing a rehabilitation exoskeleton like a consumer-grade exoskeleton? We broke down this masterclass in gait training
Translated Text:
As the consumer-grade exoskeletonmarket becomes increasingly crowded, you will notice a subtle phenomenon: most manufacturers are competing over weight, battery life, and marketing gimmicks related to hiking / trekking assist, yet few are willing to clearly explain how users can actually wear, adjust, and walk in them. In this segment, we focus on a lower-limb exoskeleton — it is not an outdoor hardcore gear like those from Aosha or Hypershell, nor is it simply classified as a walking-assist exoskeleton; rather, it is a walking assist system designed for medical rehabilitation, carrying the distinct DNA of a brain-computer interface.
We do not just want to do a cloud evaluation. A detailed breakdown of the full lifecycle of this lower-limb exoskeleton: from the bony landmark of the tibial tuberosity and the electrode pads (wetted with saline solution) to the self-balancinglogic under continuous walking mode. You will find that wearing a consumer-grade exoskeleton is far more complex than the "wear and go" concept you imagine — it is more like a rigorous joint torque calibration.
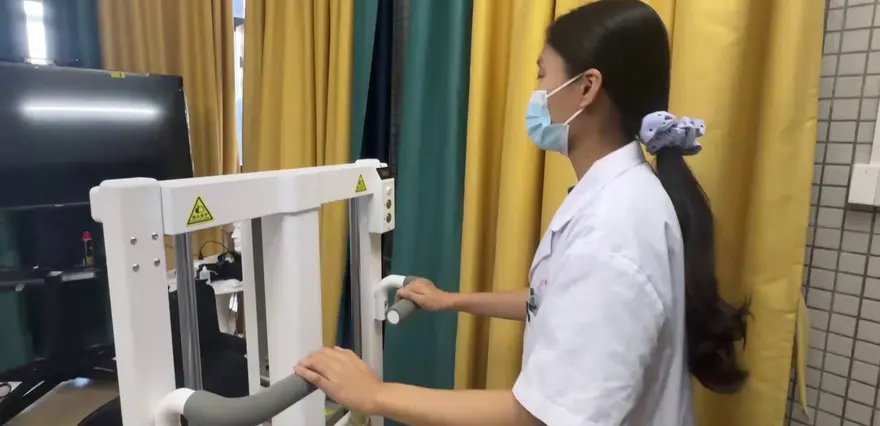

Introduction: A Wearable "exoskeleton" or a rehabilitation exoskeleton?
Before we begin, let's clarify what this device actually is. The equipment shown in the video is neither a consumer-grade exoskeleton like those from Aojing or Hypershell, nor a standard assistive exoskeleton for walking assist. Instead, it is a lower-limb exoskeleton equipped with brain-computer interface features.
Original quote from the video: "Then this is our lower-limb exoskeleton robot"—clearly establishing its identity right from the start.
Its main competitor in the segment is Aojing's consumer-grade product focused on hiking / trekking assist, rather than purely wearable devices like those from Zhaokang or Kengqin. However, this device has a clear rehabilitation focus: brain-computer interfaces, the gait cycle, and patient profiling are all hallmarks of medical-grade configurations.
Therefore, rather than simply reviewing a "product," it is better to say we are breaking down a "masterclass in exoskeleton gait training." We have divided the operation into 8 experience links: measurement and adjustment → fixing the straps → brain-computer interface → software configuration → walking mode → brain-controlled training → training completion → clinician's perspective.

Terminology correction: The ASR typo in the video has been corrected to "brain-computer interface cap" according to the glossary; has been corrected to "electrode cotton".
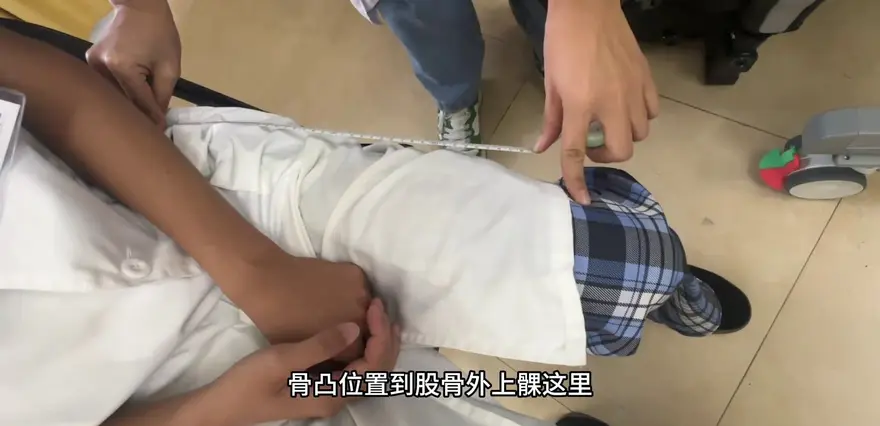
Step 1: Measure thigh and calf length — this exoskeleton’s “ergonomic fit” relies entirely on manual calibration
When putting on an exoskeleton, the first thing isn’t powering up—it’s taking your measurements. Adjusting the leg lengths on this lower-limb exoskeleton is essentially a hardcore “unboxing setup.”
The operator first measures thigh length: the starting point isn’t just anywhere—it’s at the “greater trochanter” (ASR typo has been corrected to greater trochanter), and the endpoint is the “lateral femoral epicondyle” (ASR typo has been corrected to lateral femoral epicondyle). These two bony landmarks determine whether the exoskeleton’s leg tube aligns with your bony axis.
As stated in the video: “This is the thigh length.”—Measure from the greater trochanter to the lateral femoral epicondyle.
When measuring the calf length: start at the “tibial tuberosity” (ASR typo has been corrected to tibial tuberosity), and end at the “lateral malleolus tip” (ASR typo has been corrected to lateral malleolus tip). The tibial tuberosity is a bony ridge you can feel immediately; there’s very little room for error.
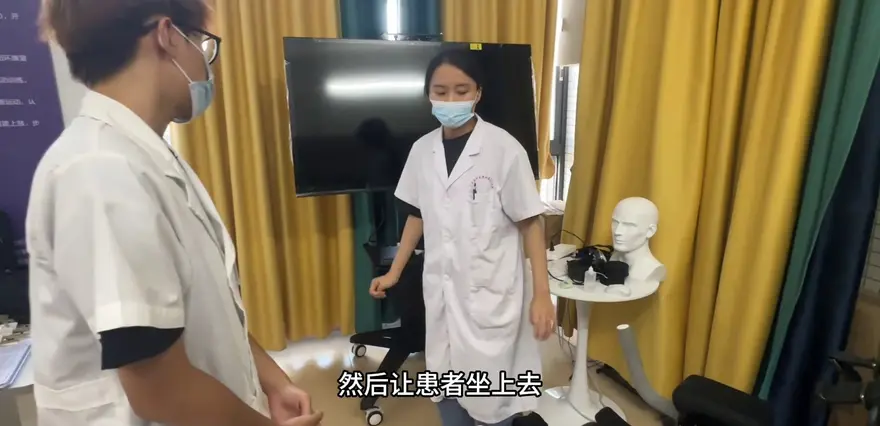
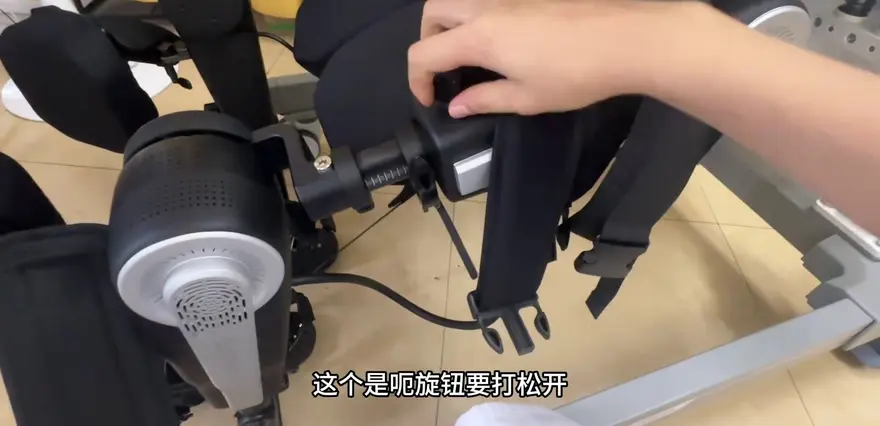
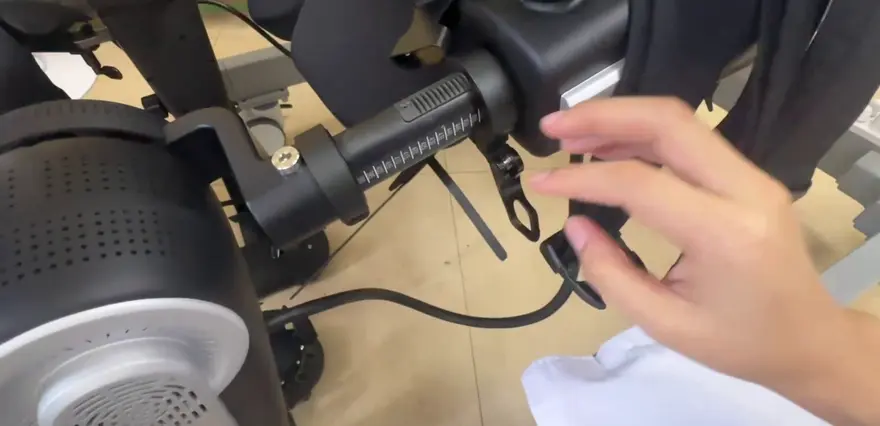
Only after measuring leg lengths do you get to what “adjustment” really means. Each thigh tube has its own set of knobs and two switches—you need to loosen the knobs first, then pull the two switches outward to extend the tube’s length.
As stated in the video: “Loosen the knobs until they’re ready for adjustment.” (Note: is an ASR error—corrected to “knob” based on context.)
The calf-length adjustment logic is identical: loosen, extend, then tighten.
Here’s the “hardcore with good reason” part: these seemingly mechanical steps actually determine how snugly the exoskeleton conforms to your body, which in turn affects the transmission efficiency of joint torque at the knee. If you don’t put it on properly, the assistive power will be wasted on slippage.
Step 2: Securing with Five Strap Groups, where "Zero Clearance" at the Knee is the Safety Baseline
Once the fitting is complete, the next step is securing the device. Donning this lower-limb exoskeleton is more like strapping on a set of "physical cheat codes": one strap across the shoulders, two on the thighs, a group at the knees, another on the calves, and two on the feet.
The operator emphasizes: "You must not miss any single strap."
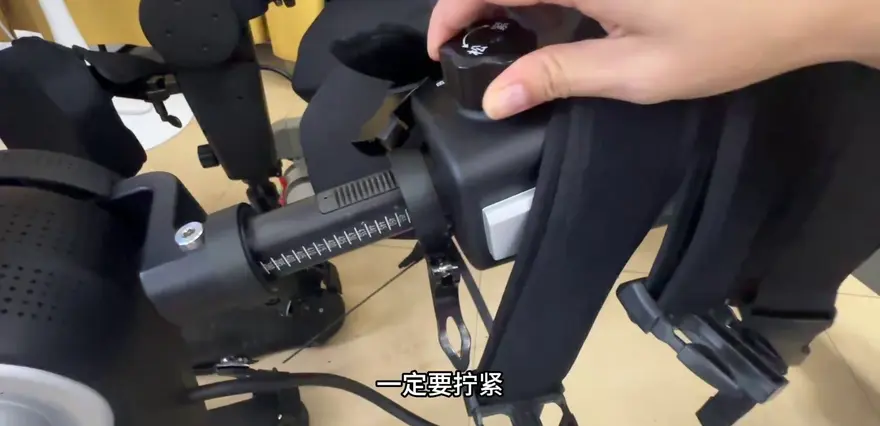
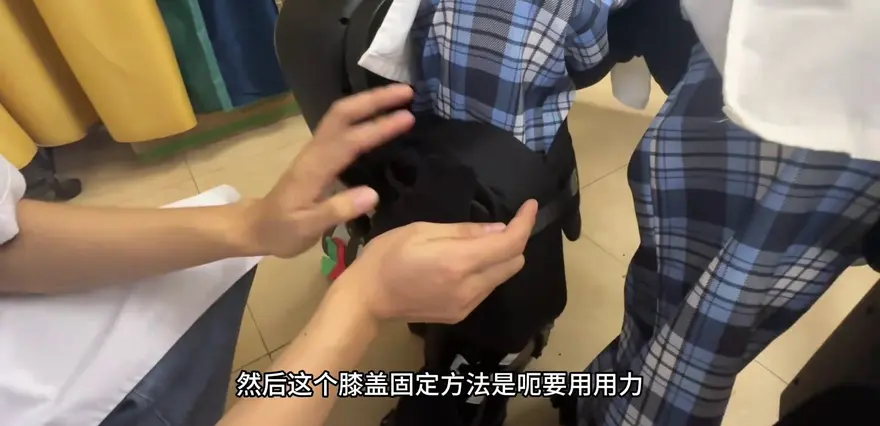
The technique for securing the knees is particularly critical. You need to use your hands to push the sponge pad toward the user's knee until there is "no clearance"—note that the ASR error (climate/air flow) is corrected to (gap) based on the context.
Quoted from the original video: "You must push it until there is no gap, and then cinch it down dead tight."
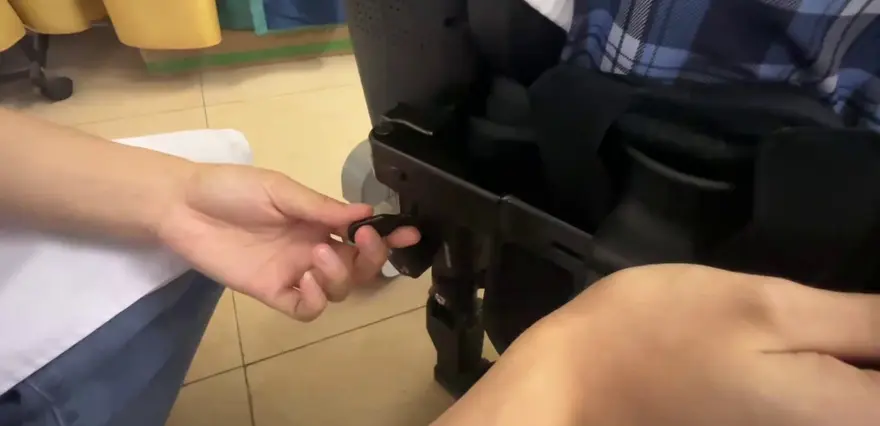
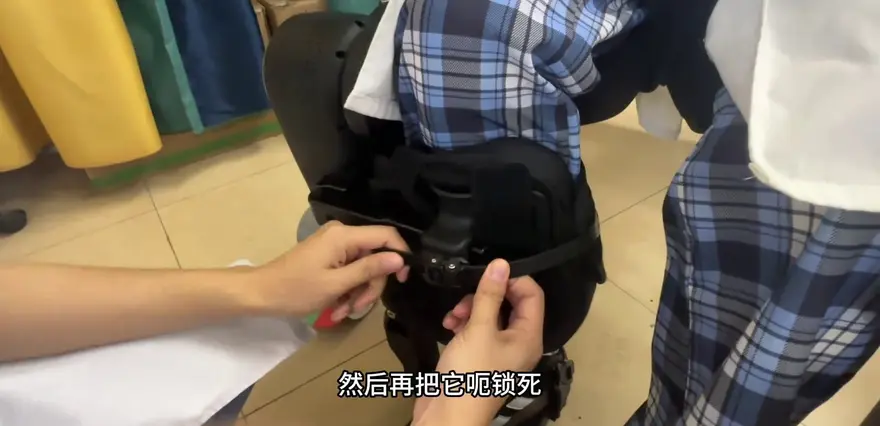
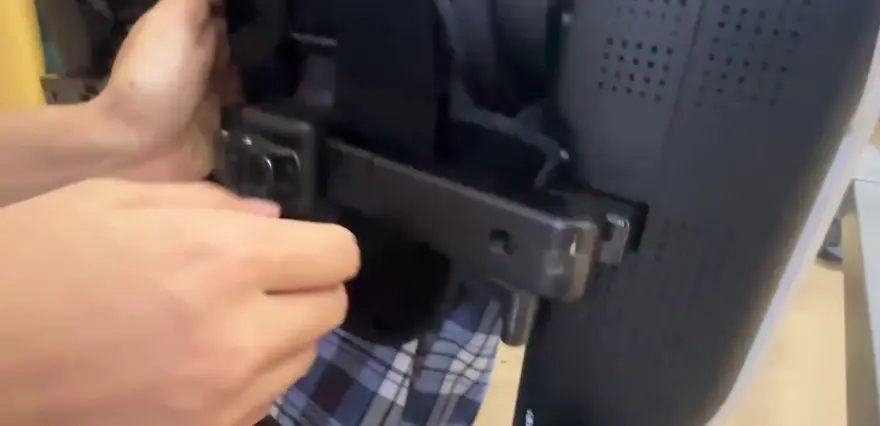
Next, there is a knob used to pull the harness tight and lock it in, creating a "mechanically locked" state.

"Locked" is a key term here. It is not just a description, but the operational standard—the knees must be in a completely locked state to ensure the exoskeleton does not produce relative displacement against the human body during lifting, walking, or descending.
Quoted from the original video: "The locked state guarantees that these knees are safe."
The logic for securing the calves is similar: push the sponge in, engage the lock, and then tighten it with the knob. The feet are relatively simpler, with only two anchoring points.
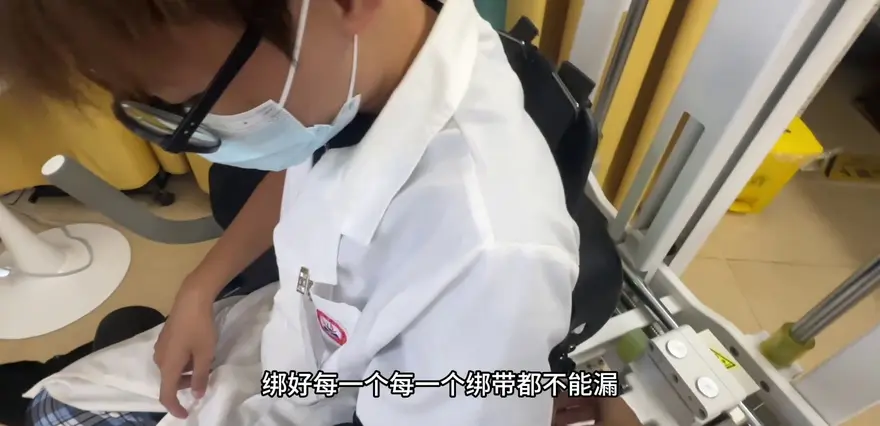
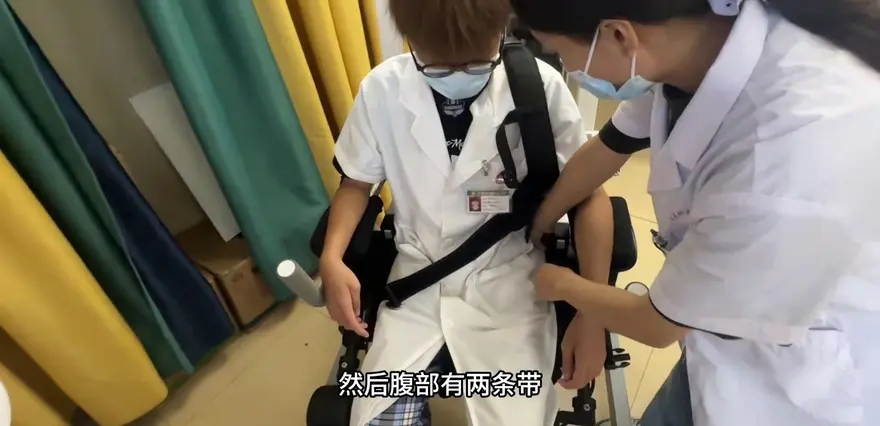
The core takeaway from this section is that the "donning" process for a wearable exoskeleton is a critical engineering issue regarding safety and comfort. It is not just about strapping the bands on; it requires creating a tension loop at every point, much like fastening a safety belt on an aircraft.

Step 3: The Brain-Computer Cap Debuts — The "Wizard Moment" of Physiological Conductive Fluid, Electrode Sponges, and EEG Signals
If the previous steps were pure mechanical engineering, the introduction of the brain-computer cap instantly imbues this exoskeleton with the romantic flair of a consumer-grade exoskeleton.
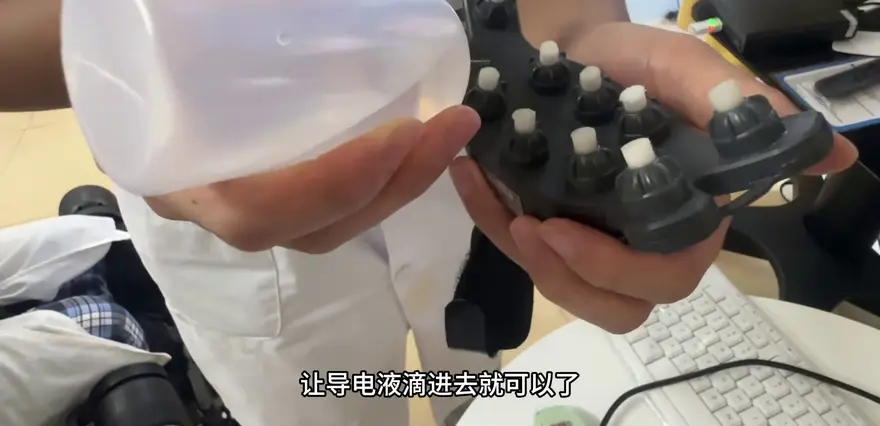
The operator takes out a brain-computer cap and instructs the user to soak the electrode sponge with physiological conductive fluid (corrected from an ASR transcription error to physiological saline). Pay close attention to the operational details here, as they are quite meticulous:
Original text mentioned in the video: "Every particle of the sponge must be soaked with this conductive fluid, but the plastic tube should not be inserted into the electrode sponge; keep it outside."
In other words, the physiological conductive fluid is "dripped" in, not "poured" in. This restraint in detail indicates that the manufacturer has clear expectations for the stability of the EEG signals.
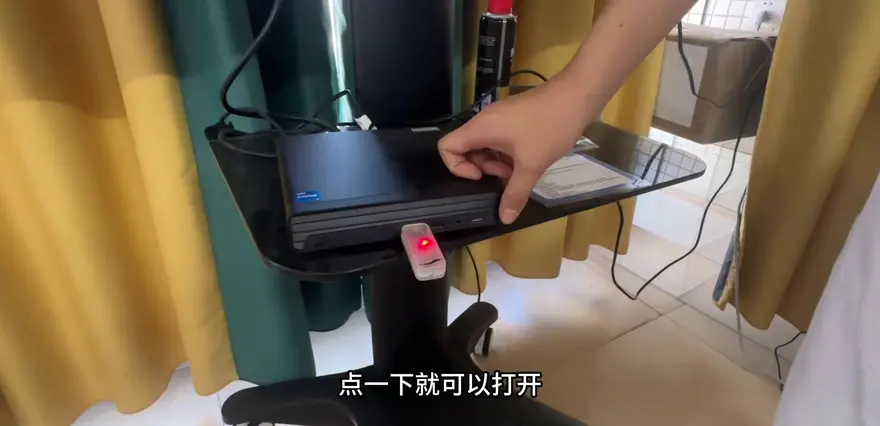
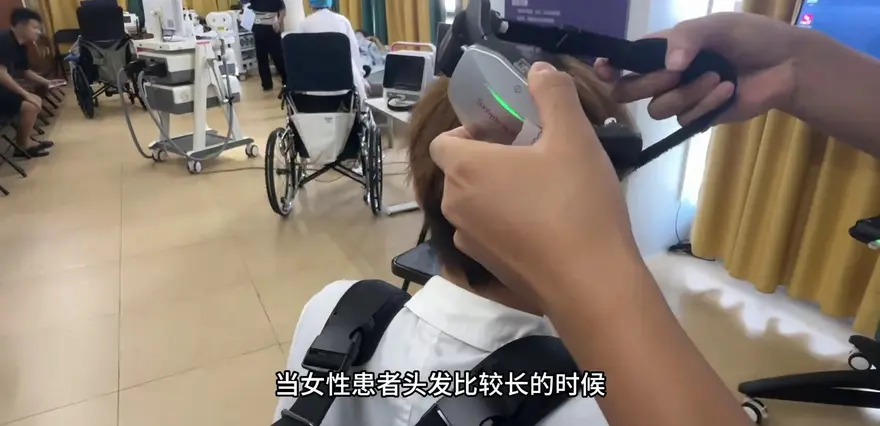
To power on the brain-computer cap, press and hold the power button for 3 seconds; a green light indicates the device is ready. When wearing it, female patients need to part their hair to both sides to expose the medial frontal lobe area (an ASR transcription error was corrected based on context to this specific anatomical term).
Original text mentioned in the video: "When a female patient has relatively long hair, she needs to part it to both sides to expose the medial frontal lobe area."
Here is a piece of trivia about brain-computer interfaces: hair severely affects the conduction of EEG signals. Parting the hair is done to prevent an increase in contact impedance, ensuring the electrode status on the software interface displays a good green/yellow color.
Step 4: Software Configuration — 10 Minutes, a Gait Cycle of 18, and the Pacing Logic of “Brain-Control Training”
Once the setup is complete, the software takes over. The management software that ships with this lower-limb exoskeleton acts like a “prescription.”
New patients admitted for treatment need to be added first: User → New → Enter name → Save → Confirm. Then return to the main screen, select the patient, and press Confirm.
Quoted from the video: “When a newly admitted patient comes in for treatment, you need to create a new one.” Here, “admission” hints at the device’s medical nature.
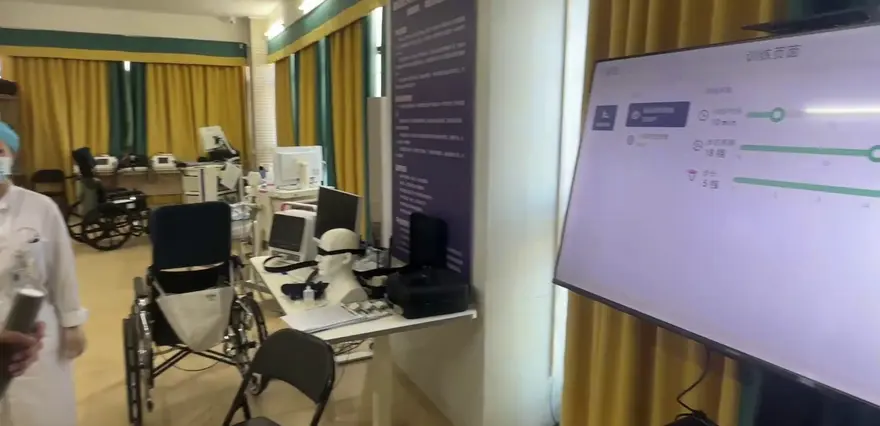
Next comes parameter setup for brain-control training. The operator typically sets the training time to 10 minutes and the gait cycle to 18.

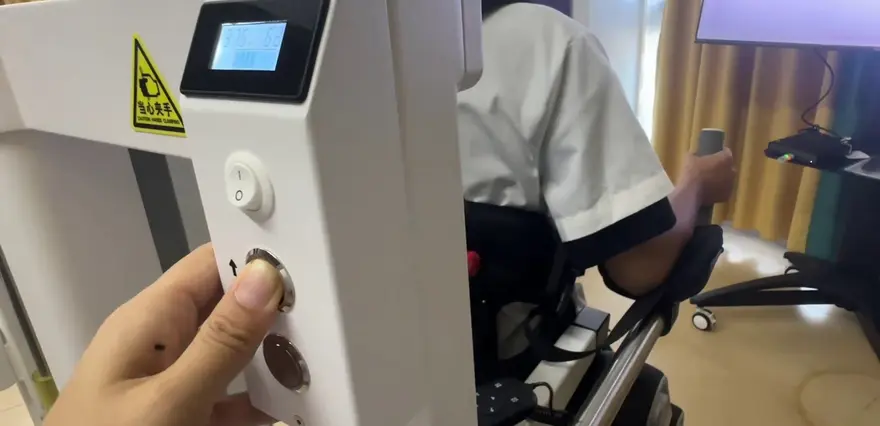
Quoted from the video: “Usually, when we do BCI training, the training time is 10 minutes, and the gait cycle is generally set to 18.”
“Gait cycle 18” is a key parameter. It effectively determines the exoskeleton’s “pacing”—the full stepping cycle is controlled within 18 time units, which is critical for the real-time feedback of the brain–computer interface and for rehabilitation outcomes.
Before training begins, you also need to check the electrode cotton contact status. The software interface displays each electrode’s signal strength; green and yellow indicate normal, while too much red indicates weak signals, which can make it difficult to complete the training.
Quoted from the video: “Too much red will make it difficult to complete the training.”
Step 5: Walking—From "Standing Mode" to "Continuous Walking Mode": How the Exoskeleton Takes Over the Body
After donning and configuring, the patient is ready to walk. This is the complete climax of the entire process.
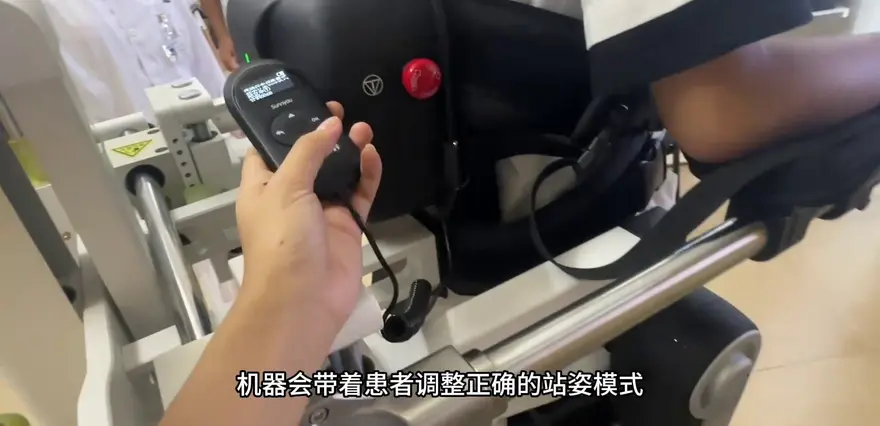
The operator presses the "standing" button on the remote controller, and the exoskeleton brings the patient from a seated to a standard standing position.
Original quote from the video: "The machine will bring the patient into the correct standing mode" — note the phrase "correct standing," which implies the exoskeleton has a preset standard for standing posture.
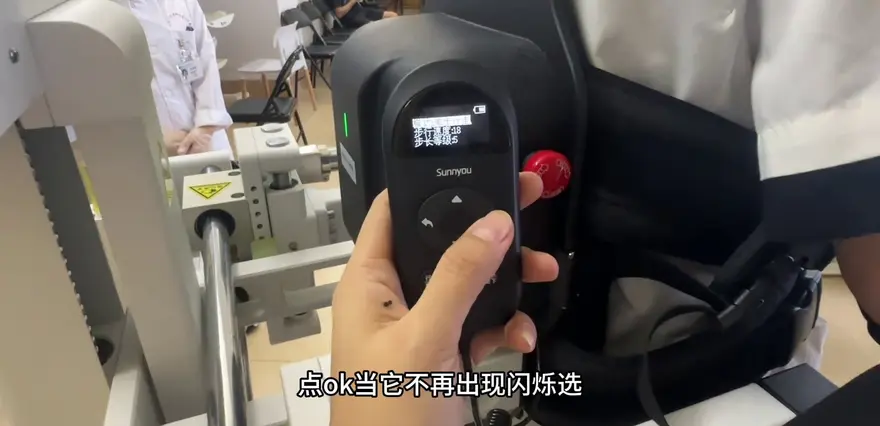
Next, the brain-computer interface begins pairing, selecting the "single-step walking mode." The operator clicks Options → OK → OK on the remote controller; when the option on the display stops flashing, it indicates that the selection has been successful.
Original quote from the video: "When the flickering option [flickering option] no longer appears, it means the selection has been successful."
Single-step walking mode is suitable for patients during initial training, allowing a controlled pace. Later, the operator switches to "continuous walking mode," allowing the patient to take large strides.
In continuous walking mode, the exoskeleton's assistance logic takes center stage. The patient does not need to exert force to push off the ground; instead, the machine carries them forward.
Original quote from the video: "Patients do not need to exert force to push; just be careful to control the direction of the machine."
The phrase "controlling direction" here means that the operator needs to control the exoskeleton's path of movement, as the patient's visual field and balance may be limited during training.

Step 6: A Complete Replay of Brain-Controlled Training — From Fixating on the Red Cross to "Being Led by the Robot"
Let's walk through the brain-controlled training process one more time.
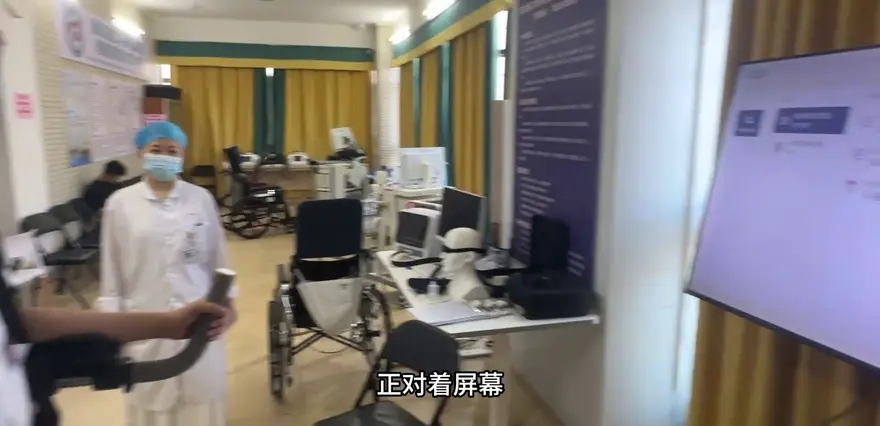
The patient sits in the brain-machine room (which functions as an independent rehabilitation training space). Before starting, they must fix their gaze on the red cross in the center of the screen to enter a state of concentration.
Quoted from the video: "Primary patient, fix your gaze on the red cross in the center."
Next, select the continuous walking mode. The operator clicks the option again → OK → OK. Once the option stops flashing, click the descend button to let the patient's feet touch the ground.
Quoted from the video: "Press the descend button to let the patient's feet touch the ground."


Once the feet touch the ground, the exoskeleton begins to lead the patient in walking. The patient does not need to exert active force; instead, the machine provides the drive. This is the core value of an assistive exoskeleton.
When pausing the training, the operator must first let the exoskeleton "lift up," and then press the pause button to return the patient to a sitting position. This "lift up before pausing" logic is designed to protect the patient from losing balance due to suddenly locked exoskeleton joints.
Quoted from the video: "When pausing, we have to lift it up. Lift it up first, and then press the pause button."

Step 7: Training Complete — From "Seated Mode" to "Applying the Brakes," the Final Step in the Loop
When the training session ends, the patient returns to the brain-machine room and prepares to sit down. The operator selects "seated mode" on the remote control, taps OK to confirm, then presses the descent button to lower the exoskeleton gradually.
Original text referenced in the video: "Select seated mode, sit down, tap OK to confirm, press the descent button, and slowly lower the patient down."
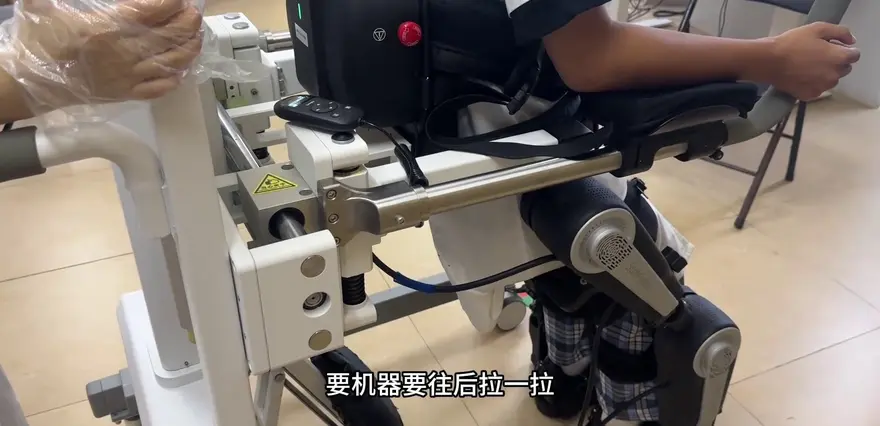
There is an interesting detail during the descent process: the exoskeleton needs to "pull back slightly." The movement does not need to be large, but it positions the thighs and the lower legs into a "flexed mode" (the original text contains a typo — "squat-foot mode" — which has been corrected to "flexed mode" based on context).
Original text referenced in the video: "The thighs and lower legs should be in a flexed mode, and when it comes down, it should be vertical."


Only after the patient is fully seated and stable can all the straps be unfastened. Here the safety logic of "apply the brakes first" is emphasized once again.
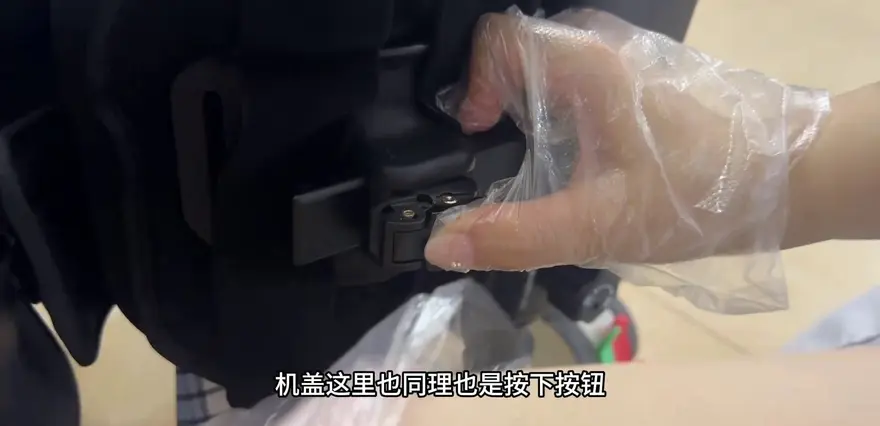
There is a sequence for removing the straps: press the thigh strap downward, hold the button, and pull it away; the knee works the same way — press the button and pull directly to release; finally, the lower-leg strap uses a knob — pull it outward, and once released, the entire leg tube comes off.
Original text referenced in the video: "You must apply the brakes to ensure the patient's safety."


With this, a complete closed loop of brain-controlled gait training comes to an end. From measuring leg length to donning and fitting, from the brain-machine interface to software configuration, from stepping out to walk to returning to the wheelchair — this lower-limb exoskeleton has completed the full sequence from "start-up to shut-down."
Step 8: The Master Class — The Ongoing Debate Between Medical and Consumer Approaches in the Exoskeleton Industry
Watching this video, the most intriguing aspect wasn’t the operational mechanics themselves. I noticed a subtle but significant “identity contradiction”: this brain-computer interface (BCI) exoskeleton closely resembles a consumer-grade exoskeleton in form—it’s lightweight, manually adjustable, equipped with remote control and companion software. However, when considering its usage scenarios, operational protocols, and patient documentation, it clearly enters the domain of rehabilitation exoskeleton.
A quote mentioned in the video: “When a newly admitted patient comes for treatment, you have to create a new profile.” The very term “admitted” clearly defines the device’s sales channels.
Interestingly, the major brands mentioned in the video—Aoshark, Hypershell, Tanluzhe, Kenqing, Yuanye, Haier, Cheng Tian, and Dnsys—all market themselves based on either “consumer-grade exoskeletons” or “assistive exoskeletons.” Yet, almost none integrate BCI technology. This is precisely the crux, as BCI serves as a core element in rehabilitation training.
So, the true competitor to this BCI exoskeleton isn’t Aoshark—it’s Zhaokang and Hypershell. By combining “brain-computer interface + gait training,” this technology elevates the exoskeleton from merely “helping save effort” to delivering medical-grade value: “restoring your gait.”
Another quote from the video: “Then, begin brain-controlled walking, focusing on the red cross in the center.” Here, the red cross serves not only as a target but also as an exercise in concentration training.

Top Community Comments
I thought this was that popular consumer-grade exoskeleton. I bought it to wear for climbing mountains, but I see it's for rehabilitation and even requires a brain-computer interface.
This comment reveals the first reaction of the vast majority of viewers: as long as something has the term exoskeleton attached, it's automatically categorized as a consumer-grade exoskeleton. This precisely demonstrates that the cognitive gap between the "consumer-grade" and "rehabilitation" markets has not yet been bridged.
From measuring leg length to adjusting the straps and then putting on the brain-computer cap, the operation is far too complex. Ordinary people simply can't handle it.
This comment raises questions about its "usability." However, the operational complexity of this brain-computer interface exoskeleton is actually a defining part of its "medical identity." The end users are doctors and rehabilitation therapists, not outdoor enthusiasts.
You have to wet the electrodes of this brain-computer cap with saline and ensure good contact with the electrode cotton. It feels more finicky than charging a phone.
This comment indirectly exposes the engineering challenges of a brain-computer interface. Acquiring EEG signals is a very "delicate" process; if the impedance is slightly high, it becomes difficult to complete the training. This is an issue almost never encountered in consumer-grade exoskeletons—because most so-called "brain-computer" features are merely gimmicks.
The video completely fails to mention this exoskeleton's specifications: endurance (in hours), max payload, battery, price...
This comment is very accurate. What users care about is "product strength," but this video is fundamentally a "teaching demonstration," not a "product review." Its focus is on "how to use it," not "is it worth buying."
Watching this video feels like watching surgical training. Not a single step, from the buckles to the straps, can be missed.
This comment is spot-on. The process of fitting a brain-computer interface exoskeleton is indeed far more rigorous than for consumer-grade products—because a proper "fit" directly impacts the quality of the EEG signals and the effectiveness of the training.
When fastening it at the knee, you have to "push it until there's no gap and then lock it." This is a core design for preventing secondary injury and is absolutely essential.
The author of this comment has clearly recognized the designer's intent. This "slip-proof, offset-proof, and rotation-proof" fastening logic is equally critical in assistive exoskeletons for walking assist, but it is often simplified in lightweight consumer-grade exoskeletons.
One-Sentence Summary
This "master class on gait training" for brain-computer interface lower-limb exoskeletons reveals that a consumer-grade exoskeleton can be turned into a "walking stick worn on the body," but it can also evolve into a medical-grade form factor of "exoskeleton + brain-computer interface + gait training" — making it ideal for stroke rehabilitation patients, neurosurgeons, and tech geeks tracking the cutting-edge fusion of brain-computer interfaces and exoskeletons.
Target Audience: Patients and their families seeking brain-computer interface rehabilitation, as well as neurosurgeons and orthopedic doctors at rehabilitation centers.